IBM has published a tutorial on using Texas Instruments’ (TI) SensorTag kit with BeagleBone Black: https://developer.ibm.com/iot/recipes/ti-beaglebone-sensortag/
The SensorTag kit connects six (6) sensors to TI’s CC2541 Wireless MCU that features Bluetooth Low-Energy (BLE) connectivity. The sensors are temperature, humidity, pressure, accelerometer, gyroscope and magnetometer. It seems to me that connecting some of these to a BeagleBone Black could be pretty handy for collecting environmental data, so I decided to try it out. (disclosure: I work on BeagleBone Black and for TI, so I figure my employers wouldn’t mind me doing this on company time either.)
Personally, I like to develop over the USB cable, so I tend to use Internet Connection Sharing to be able to get out to the Internet from my board. The virtual serial port makes it easy to stay connected while you fetch a new IP address using something like ‘dhclient usb0’. If you are throwing your BeagleBone on the network another way, simply working from the Cloud9 IDE GUI is probably the easiest way to go.
I’ll also point out that the current BeagleBone Black USB stack doesn’t like to always detect hotplugged connections, so inserting the dongle before plugging the board in can make for a better experience. Use ‘lsusb’ to see if the BLE adapter is detected.
The setup.sh script ran for about 5 minutes or so. The tutorial didn’t mention this time, but I did have time to go grab a cup of coffee. After running the setup, running the code to start sending data up to IBM’s cloud is pretty darn simple.
root@beaglebone:~/iot-beaglebone/samples/nodejs# node iot_sensortag.js
Press the side button on the SensorTag to connectMAC address = 90:59:af:69:c0:42
MQTT clientId = d:quickstart:iotsample-ti-bbst:9059af69c042
sensortag connect
discoverServicesAndCharacteristics
MQTT Connected
readDeviceName
        device name = TI BLE Sensor Tag
readSystemId
        system id = bc:6a:29:0:0:ac:ac:7d
readSerialNumber
        serial number = N.A.
readFirmwareRevision
        firmware revision = 1.4 (Jul 12 2013)
readHardwareRevision
        hardware revision = N.A.
readSoftwareRevision
        software revision = N.A.
readManufacturerName
        manufacturer name = Texas Instruments
enableIrTemperature
enableAccelerometer
enableHumidity
enableMagnetometer
enableBarometricPressure
enableGyroscope
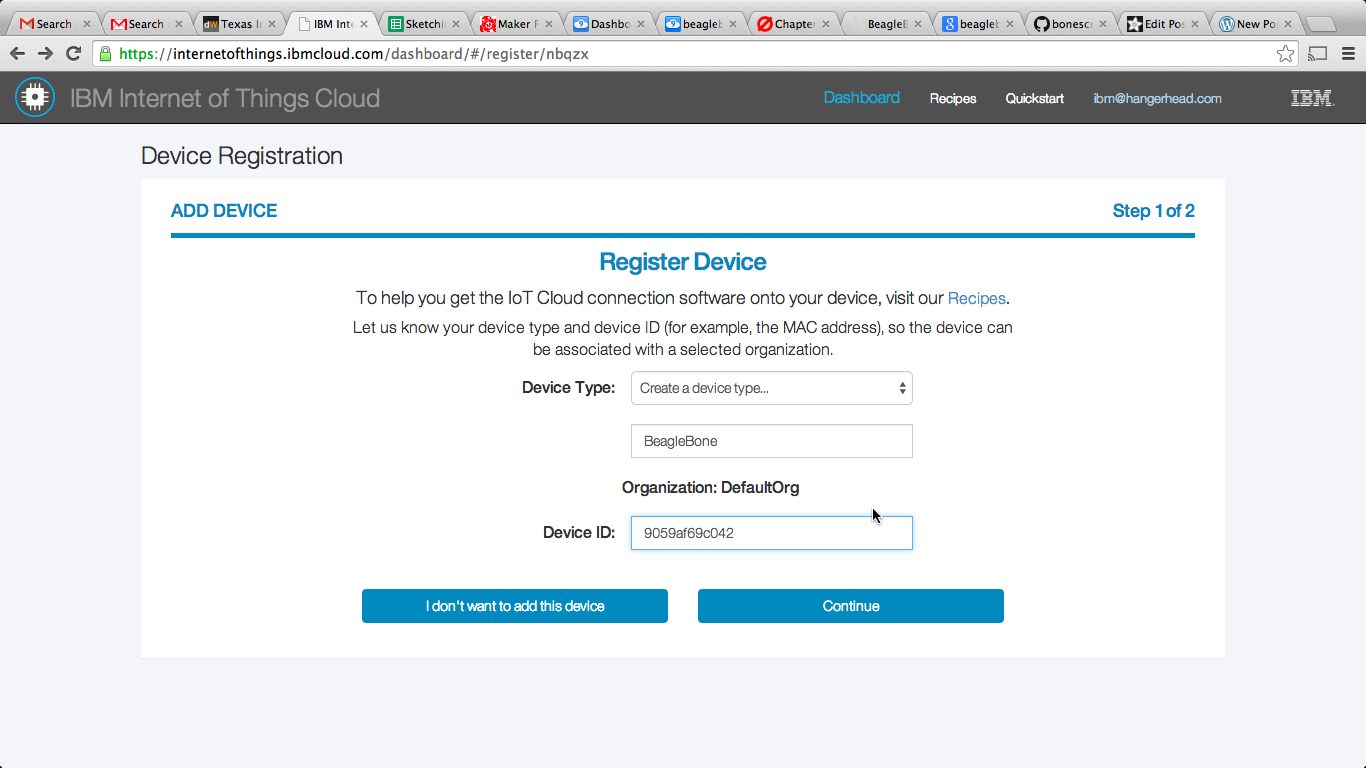
I input the MAC address into IBM’s page and was greeted with the following screen.

My next question was how do I gather this data for my own use. It seems IBM is looking for people to register to use their cloud service. With tools like Dweet.io, which is registration free, and Xively, which is already quite popular, I’m not sure what advantages the IBM service offers, but I’ll give it a shot for you.
One item I wasn’t expecting was the need to remove the colons from the MAC Address when attempting to register my device. I was also disappointed BeagleBone wasn’t one of the pull-down selections, so I had to add it.
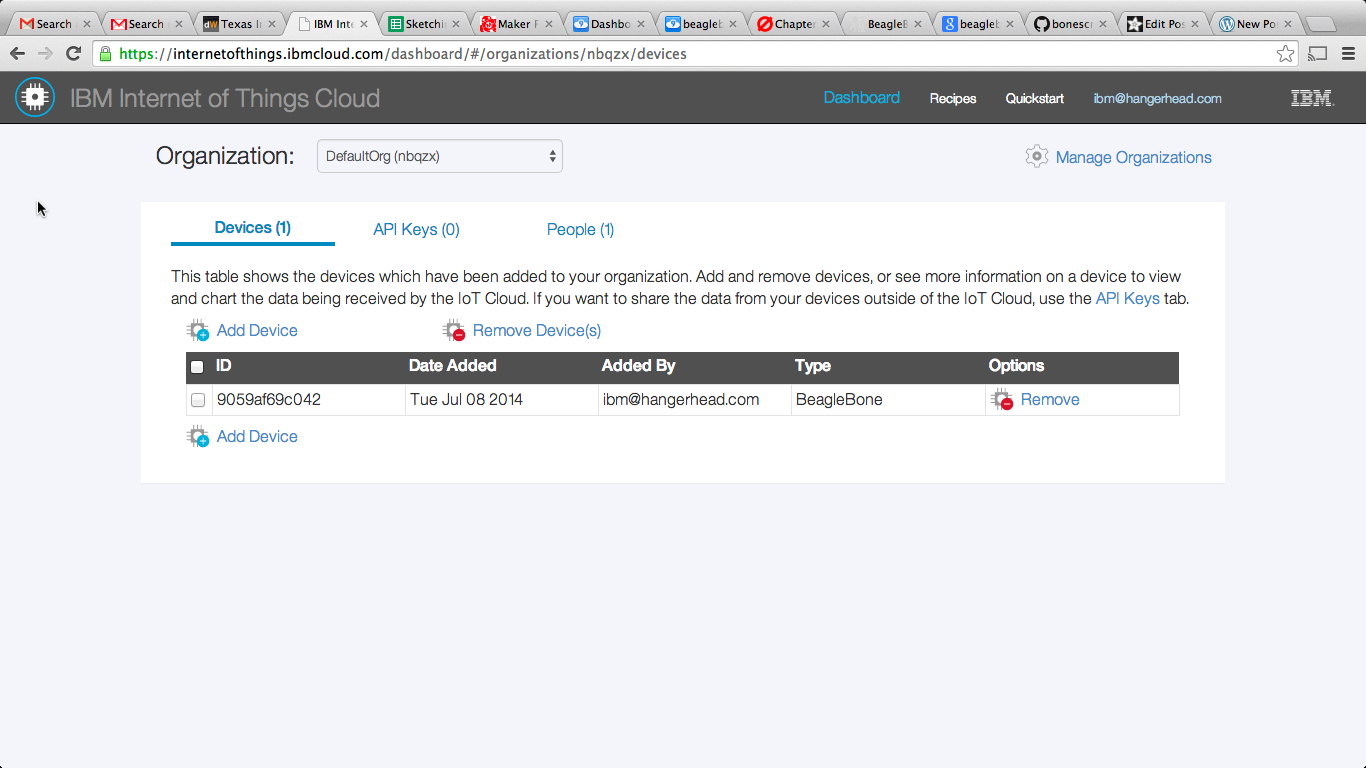
The dashboard shows the board, but doesn’t show a lot of interesting controls to interact with the data.
At this point, there is a huge gap of information to figure out what is easy to do. From the tutorial, there is the quote “You can write an application which sends the payload { “rate”: 2 } to the topic iot-2/type/iotsample-ti-bbst/id/<id>/evt/blink/fmt/json”. You can gather some meaning for this in the source of the code running on the device, but it certainly isn’t clear how you’d need to send information into IBM’s cloud. I opted to try out the Node-RED integration with a trial of IBM Bluemix, assuming that I can always go back to running Node-RED on BeagleBone. I was able to create a Node-RED instance on their cloud, but it wasn’t easy trying to figure out how to start collecting data.
I’m still new to MQTT and Node-RED, so when I couldn’t figure it out, I started to dig into the HTML/JavaScript on their demo page. It turns out, they are using a browser-based websocket MQTT JavaScript library. I deleted the device.cfg the registration process had me create and I started debugging the connection under a JSFiddle.
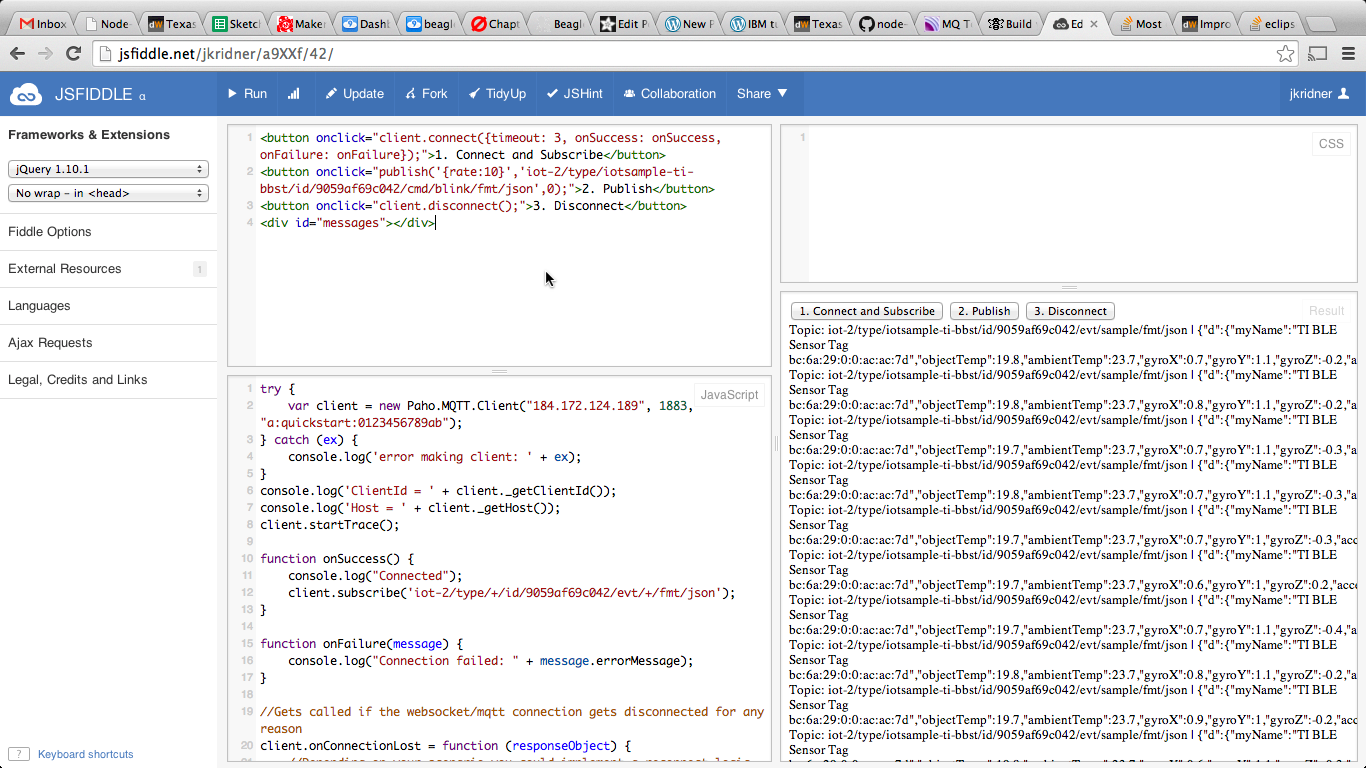
Once I figured out the correct configuration, I was able to reproduce it with the Node-RED client.
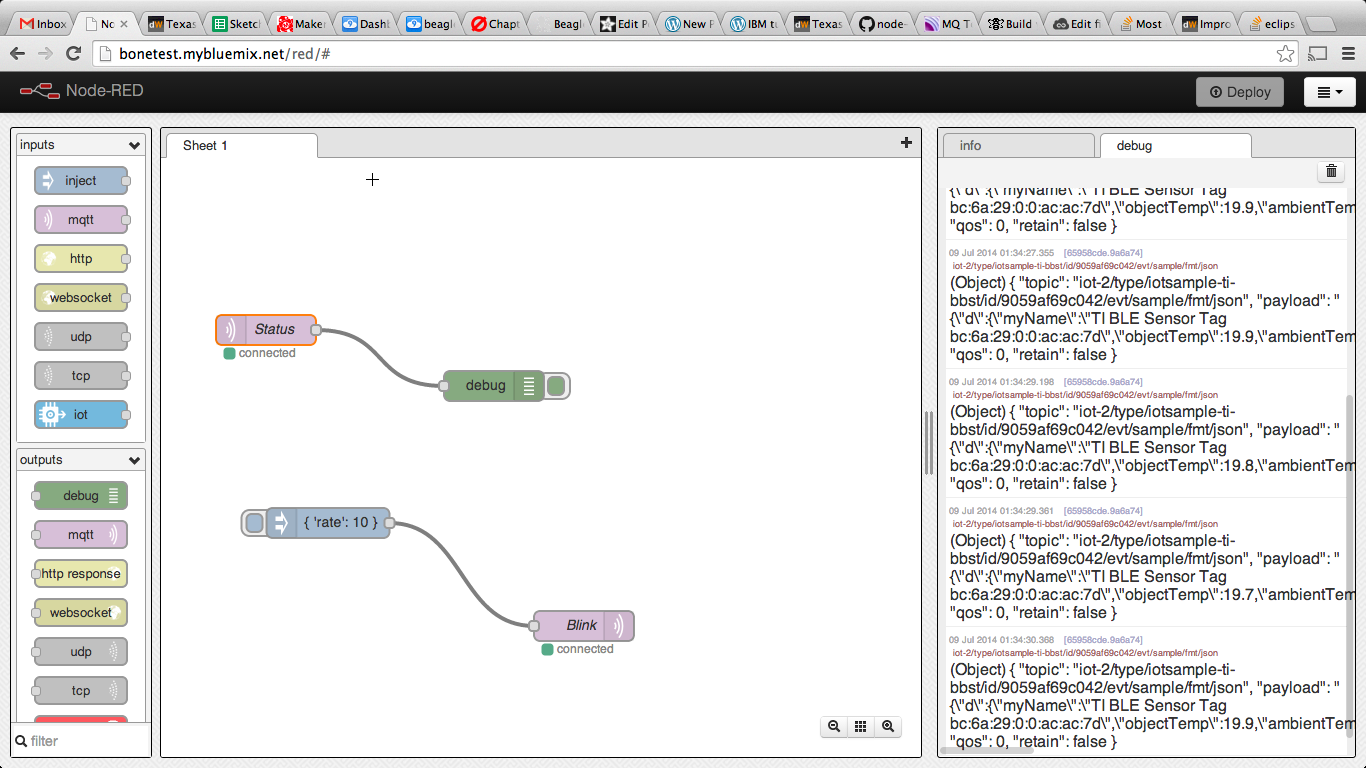
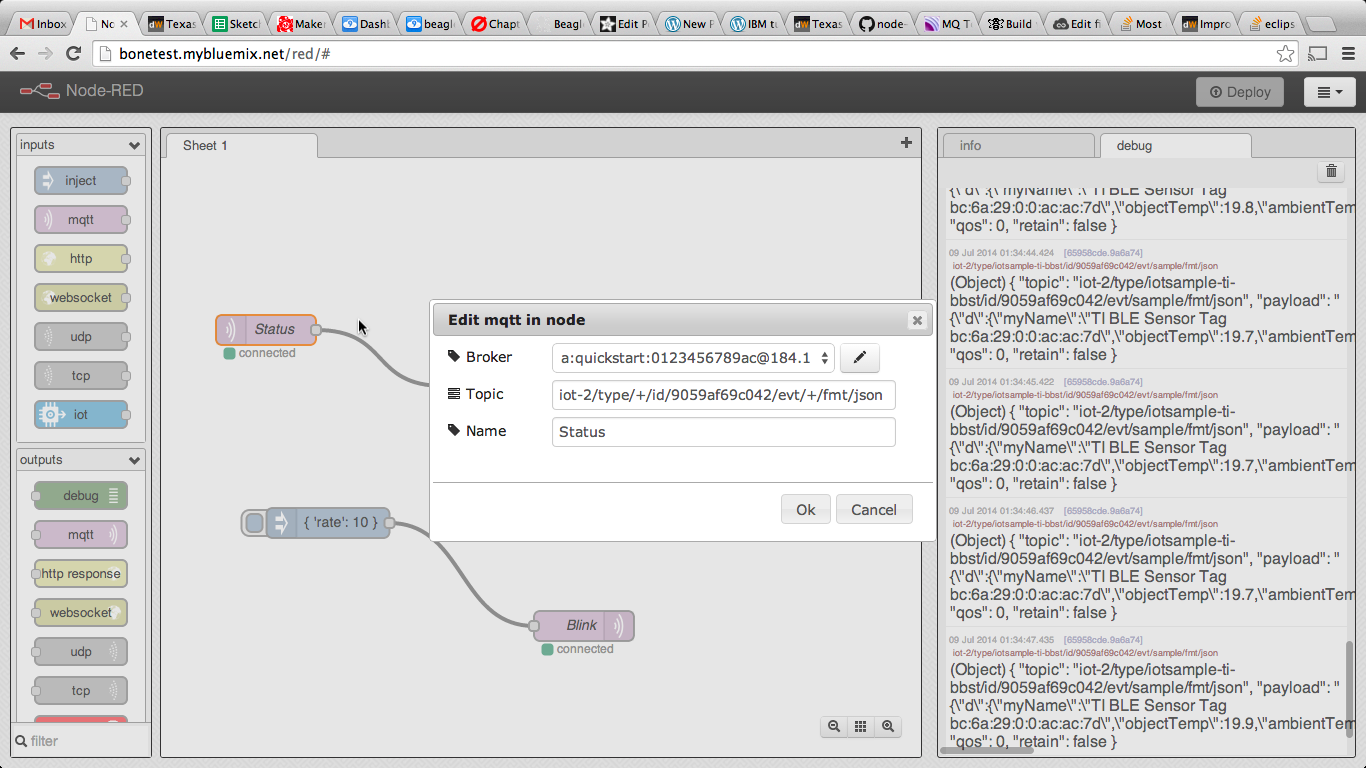

The Node-RED graphical flow-diagram environment seems to be a bit awkward to me for working with MQTT due to the debugging headaches, but it is getting close. Fewer and simpler parameters for the nodes, along with self populating options, should clear this up in a few minor revisions. The other data sources/sinks like RSS feeds, Twitter, etc., seem much easier to use.
What this whole exercise pointed out to me was how easy it is to use a BLE dongle and TI SensorTag kit with BeagleBone Black and Node.JS using the sensortag npm module. That part was really simple and a lot of fun. It also got me interested in learning more about MQTT services and Node-RED.
Read the IBM tutorial and another blog post on the entire process.