Categories: Intermediate
Want to use Yocto on Beaglebone Black. No problem!
What is the Yocto Project?
Yocto is an Open Source project that enables users to create custom GNU Linux systems on embedded. This project began in 2010 as a collaboration of hardware vendors. The development environment includes debuggers, Application toolkit generator, and emulation environments. The core system recipes are available from the OpenEmbedded Project. The Yocto kernel and build profiles have been community test and include architectures for:
- ARM
- PPC
- MIPS
- x86
- x86-64
- An Eclipse plugin is also available
Covered in this project:
- Workstation setup
- Building images
- partitioning and copying image to SD
- Boot from SD
Setting Up the Workstation
Ubuntu or Debian
I personally, do not like Ubuntu. However, for the purposes of this project, the team members requested I perform this work at the middle school level and requested Ubuntu. So, for the purposes of this project, you could use Ubuntu – even though I highly recommend against it. Keep in mind some dependencies may be on your system but updated. This may work. Otherwise use a container or virtual machine. Then, you won’t need to have Ubuntu on your machine. 🙂
You will need at least 50 gb of free disk space that is running Ubuntu 14.04 or greater.
Build Host
BUILD HOST is based on the OpenEmbedded Project. This project uses bitbake to construct images.
Reference Build Host POKY = Bitbake + OpenEmbedded
The OpenEmbedded build system is able to run on Ubuntu that has the following versions for Git, tar, and Python.
Dependencies – OpenEmbedded
Git 1.7.8 or greater
tar 1.24 or greater
Python 2.7.3 or greater excluding Python 3.x, which is not supported.
Dependencies – Build Host Packages
These packages installed on the build host using an
Ubuntu System
- bc
- libsdl1.2-dev
- build-essential
- pkg-config
- chrpath
- socat
- diffstat
- subversion
- gawk
- texi2html
- git
- texinfo
- libncurses5-dev
- u-boot-tools
Again, if you use Ubuntu, you can use sudo. Debian does not come with sudo, so just apt-get as you normally do – as superuser su whatever.
sudo apt-get install bc build-essential chrpath diffstat gawk git libncurses5-dev pkg-config socat subversion texi2html texinfo u-boot-tools
Repositories
YOCTO RELEASE
Clone the Yocto Project repository poky jethro. Below is an example from an Ubuntu build host that clones the poky repository and then checks out the latest Yocto Project Release:
git clone -b jethro git://git.yoctoproject.org/poky.git poky-jethro
META-OPENEMBEDDED
Clone the OpenEmbedded repo.
git clone -b jethro git://git.openembedded.org/meta-openembedded
META-BEAGLEBOARD repository
Clone the official Beagleboard repo. Before cloning, create a sub directory and change to that directory.
mkdir bbb

cd bbb

git clone git://github.com/beagleboard/meta-beagleboard
Building Images
Now that you have your system requirements in order, you can give the Yocto Project a try. This section presents steps that let you do the following:
Initialize the Build Directory
The build directory can be either manually created or created using the oe-init-build-env script.
1. Manually – Configure these paths to the meta layers per your standards.
2. With the script oe-init-build-env
Customize the config files
When using oe-init-build-env to create the build directory, some configuration files are generated in the build/conf directory.
Editing bblayers.conf
The directory structure in bblayers.conf should look like this
~/poky-jethro/
meta-openembedded
~/bbb/
meta-beagleboard
build/
conf/
Editing local.conf
There are 3 variables to edit in local.conf
Editing these are not necessary but optional.
DL_DIR – Where downloaded sources are stored
SSTATE_DIR – This is usually 5gb and can be moved from home
TMP_DIR – Where the temporary build and final binaries are found
Initialize the Build Environment:
Run the oe-init-build-env environment setup script to use bitbake. This defines the OpenEmbedded build environment for the build host and will not overwrite the customized conf files.
source oe-init-build-env
Note: Use bitbake in the build directory.
Run the Build
core-image-sato
Change directory to the build directory to use bitbake.
To build the core-image, run the command:
bitbake core-image-sato
Note: Depending on your workstation specifications and internet connect, this could take awhile.
Build Errors
If you have build errors due to package download failure, clean the failed package and rerun the build.
bitbake -c cleanstate.file

bitbake file
Resume the full or long build
bitbake core-image-sato
The cleansstate command works for image recipes also.
Copy to the SD card
The core or long build can take some time, depending on your internet speed and hardware. There is a difference when copying a long build or a minimal build to the SD card, as well.
Partition the SD card
Partition the SD card with at least 2 partitions using gparted, fdisk, or another tool.
sudo apt-get install gparted
Insert the SD card into the workstation.
sudo gparted
Use lsblk or df -h to find the microSD card.
Warning:
This will format any disk on your workstation. Select the specified SD card listed when using lsblk or df -h. In some cases, the SD card may be mmcblk0 or sdb. Double check to make sure the correct device is being formatted.
Partition 1:
Set the “boot” flag for the first partition.
- type: FAT32
- size: around 30MB
- label: BOOT
- flags: boot and lba
Partition2:
- type: ext4
- size: around 200MB, or remaining SD-card space
- label: ROOT
After partitioning is completed, we are ready to copy the files to the SD-card.
Long Build
After completing the build, the following images are the most important found in the <TMPDIR>/deploy/images/beaglebone:
bootloader kernel rootfs
- MLO-beaglebone
The second stage bootloader (the first stage bootloader is implemented in ROM code on the AM335x chip and cannot be altered in software)
- u-boot-beaglebone.img
The third stage u-boot bootloader (the “main” bootloader)
Copy the boot loaders. The media or SD may be something like /media/bbb/BOOT/MLO. Check your system for the location to copy to the SD.
sudo cp -v MLO-beaglebone /media/bbb/BOOT/MLO

sudo cp -v u-boot-beaglebone.img /media/bbb/BOOT/u-boot.img
- zImage
The Linux kernel image (zImage is a special format used with u-boot bootloader) zImage is found in root/boot/
- core-image-base-begalebone.tar.bz2 or something similar
This archive contains the root file system.
sudo tar x -C /media/root -f core-image-sato-beaglebone.tar.bz2 /media/bbb/root
After completing the copying process, unmount the SD partitions. Then, insert the micro SD card into the Beaglebone. and continue to the section below on how to boot the Beaglebone.
*Minimal RootFS Instructions
If you build a minimal rootfs:
- Install modules-beaglebone.tgz.
sudo tar x -C /media/root -f modules-beaglebone.tgz /media/bbb/root
- If you used core-image-base, rootfs already includes the kernel, modules and Device tree files needed to work with the u-boot default configuration
- Install the kernel uImage to /boot in rootfs and install the device tree files into rootfs /boot. Include zImage-4.4-r4am335x-boneblack-xxx.dtb
sudo cp uImage-beaglebone.bin /media/root/boot/uImage

sudo cp uImage-am335x-bone.dtb /media/root/boot/am335x-bone.dtb

sudo cp uImage-am335x-boneblack.dtb /media/root/boot/am335x-boneblack.dtb
After completing the copying process, unmount the SD partitions. Then, insert the micro SD card into the Beaglebone. and continue to the section below on how to boot the Beaglebone.
Reference:
https://www.yoctoproject.org/downloads/bsps/daisy16/beaglebone
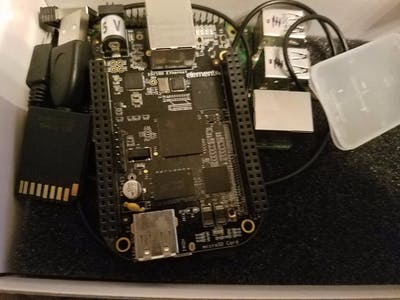
Boot from the SD card
Connect the microHDMI cable to the Beaglebone Black. Connect the HDMI end to an HDMI output device such as a television or monitor.
The Beaglebone Black has Debian preloaded. You can flash the image to the onboard eMMC so the SD will boot or boot holding down the S2 switch. There are 4 different ways of booting up: eMMC boot, SD boot, Serial boot, and USB boot.

For SD boot, hold the S2 switch on the Beaglebone Black for at least 5 seconds. The lights on the Beaglebone will indicate the BBB is booting.
Login
To login, use the keypad and type the username at the prompt.
Username:
root
Password:
The Yocto default username is
root
. By default, there is no password. After entering root as the username, select the enter key to login.
Conclusion
By using Yocto, you can create customized images using recipes. Once your customization is complete, your images can be used across multiple platforms using Yocto.
Linux® is a registered trademark of Linus Torvalds.
Yocto Project™ is a registered trademark of the Linux Foundation.
Comments are not currently available for this post.