Categories: Beginner
Motion sensor + PocketBeagle + LED light strand will light up the Holidays when visitors come to your home or office. Simply walk up to the
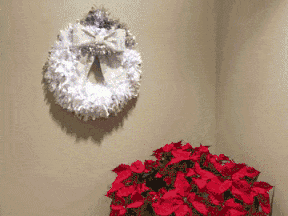
Holiday Wreath
and the motion sensor will signal PocketBeagle to light up the LED strand.
This project is a nice starter project to build upon. BeagleBoard.org PocketBeagle has great performance along with a tiny size and low cost. It makes a perfect platform for building a small battery powered electronics project. Since PocketBeagle’s size is even smaller than Raspberry Pi or other similar boards, we were able to fit our project neatly into a wreath.
You could enhance your smart home and put your motion sensor project into a number of different small form factors. Click boards make it easy to add other features – we’ve done motion detection; but you can add other capabilities such as controlling movement, having sound or using sensors. You can even connect it to your twitter account!
All parts easily purchased. Only beginner skills needed. Full instructions below.

1) Connecting Headers to PocketBeagle
Connect the Headers:
To connect the MikroElektronika Motion Click Board to PocketBeagle you’ll need 2 x 8 pin female headers. We like the narrow single row headers from SparkFun that fit into the inside rail of Header P1 and P2 on PocketBeagle leaving the external rail free.
To position the headers for the click, use the first 8 pins on the inside rails on each side from the microSD card end of the board. (This is Header P1: Pins 36, 34, 32, 30, 28, 26, 24 and 22 as well as Header P2: Pins 35, 33, 31, 29, 27, 25, 23 and 21).
Solder those on and clip them. (We used one of the tips in this forum post about headers to hold them steady during soldering by first putting a click board in them.)We added a 3rd female header to P1 inside rail so that we can easily use it to connect to the LED strand. (This is Header P1: Pins 2, 4, 6, 8 ,10, 12, 14 and 16.) Solder this in and clip.
2) Adding the Motion Sensor
The MikroElektronika Motion Click Board fits easily onto PocketBeagle’s headers and only requires 3.3v power. In fact, you can fit 2 Mikro Click Boards onto PocketBeagle. When you’ve completed this project, you will enjoy expanding it to include other Click Boards.
The MOTION click carries PIR500B, a pyroelectric sensor which generates a voltage when exposed to infrared radiation emitted by live bodies (the white plastic Fresnel lens covering the sensor filters visible light). The signal is processed by a BISS0001 PIR sensor controller which sends an interrupt to PocketBeagle through the mikroBUS INT (out) line.MOTION click is ideal for alarm systems, light switch controllers, and similar systems where human presence needs to be detected. An onboard potentiometer lets you adjust the detecting range (up to 4 meters) of the sensor easily after you install it into your project.
3) Adding the LED Strand
- About the LED Strand:
The LED strand we chose (Product 322 from Adafruit) has 25 x 12mm diffused thin digital RGB pixel lights. They are sturdy, bright, can work for indoor or outdoor use and are well supported on the Adafruit website. You can also choose a similar product 738.
The pixels are connected by a 4-conductor cable. +5V (Red), Ground (Blue), Data (Yellow) and Clock (Green). Data is shifted down from one pixel to the next so that you can easily cut the strand or attach more onto the end. Each strand has a JST SM 4-pin connectors (male on one end female on the other) with the power wires (red & blue) spliced out so its really easy to connect 5VDC.
- Connecting the Jumpers to PocketBeagle:
Each dot on the strand is digitally controlled, with an internal 8-bit PWM LED driver (24-bit color for 16 million different shades). The pixels must be clocked by PocketBeagle using the Serial Peripheral Interface (SPI) so we will choose 3 pins to connect to PocketBeagle via the extra female header on the P1 side. There are reference charts for all pin names and functions in the PocketBeagle System Reference Manual in Section 7. The header pin numbers and names are also marked nicely on the bottom of PocketBeagle.
The 3 pins we need on P1 to run the LED strand are below. Power will be added separately.
- P1.8 SPI0_CLK connects a red jumper
- P1.12 SPI0_MOSI connects a blue jumper
- P1.16 GRND connects to a black jumper
- Connecting the Jumpers to the Light Strand
We can now connect the jumper wires to light strand. Using the female end of the light strand, insert the 3 male jumper wires such that you have connected to the green, yellow and blue. We used the following configuration for the project.
3) Powering the Project
- PocketBeagle is powered via the microUSB for this project and can then power other peripherals via the header connections. In this project we have chosen to power the Motion Click using power directly from PocketBeagle headers. We will power the LED strand using a separate USB power connector. This will leave our project more flexible for power budgeting in the future.
- Powering the LED Strand:
The LED strand provides power and ground connectors split from the blue and red wires at each end of the strand behind the JST connector. We will make our own 5v USB Power cable to connect to those. To do this we’ll need to cut the end off of a USB cable and wire it directly to the power and ground on the strand.
Cut off the end of a USB power connector to dedicate to this project. When you peel back the casing you’ll see something similar to the diagram below. Since we will only use this as a power cord, you can tape up the White and Green data wires.
On the Male end of the JST connector (where you have 3 jumper wires installed) you’ll see a red and blue wire spliced out. Connect the red wire of the USB cable to the red spliced wire from the light strand by twisting the wires tightly together (you may need to peel back some of the protective casing to reveal more cm of wire). Do the same for the black wire from the USB to your blue spliced wire from the light strand. Tape each connection tightly in electrical tape.
4) Building your Welcome Wreath
We chose a Wreath for our project since PocketBeagle is so tiny that it could fit on the project discreetly. We got ours on sale at the local dollar store. It has plenty of fluff to hide the wires of the project and a frame to attach the light strand.
Place the wreath down on the table with the back facing up, Lay the light strand loosely along the circle of the wreath. Make sure you position the PocketBeagle + Motion Sensor near the top of the wreath so that it will activate when people walked by.
Push the LED lights through the wreath branches and attach he wire periodically to the frame with twist-ties.
Bring the power cables from both PocketBeagle assembly and the LED light strand down around the wreath to the battery which will install in the bottom to balance out. Electrical tape all connections and install the battery into the wreath with additional twist ties.
5) Installing and Running the Code
- Get the Basic Software:
Go to
www.beagleboard.org/pocketbeagle
and download the latest image onto your microSD card.
- Download the Project Software:
Click on the Code link in this Hackster and download holiday_motion_detection_demo.zip into the same folder as your pocketbeagle image and unpack the code
- How to Run
: In the directory that the code is unpacked:
1) Change permissions on the scripts:

       chmod 755 motionLEDPinConfig.sh

       chmod 755 run_motion_demo.sh

2) Run the demo code

       ./run_motion_demo.sh

To auto-run on boot,

see the documentation in run_motion_demo.sh
Supporting Documentation:
6) Final Steps
You are now ready for final installation of your PocketBeagle Motion and LED light system into your home automation unit (wreath). Take the time to wrap any connections in electrical tape. This will help insure stability of your project. Tuck everything away behind the wreath and plug your USB connections – one for PocketBeagle, one for the LED strand into your Battery. We used cables long enough to place the battery at the bottom of the wreath to balance it.
You can easily add more features such as internet connection or motor to move something or sense other things with PocketBeagle and Click Boards. Let us know what you build?
Comments are not currently available for this post.