Categories: Beginner
Motivation
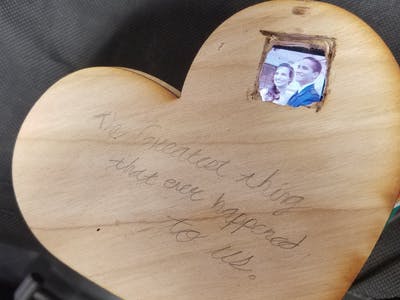
After dating my girlfriend for a long time, I decided it was time to step up my gift game and develop a completely new gift for her. I wanted a gift that could bring together as many elements of our relationship as possible but I also wanted it to be a physical gift. This then lead me to the creation of the LoveBox: a music box that plays our favorite song (La Vie en Rose) and displays pictures of some of our favorite memories.
Overview & Operation
To use this all you need to do is download the python files and upload your mp3 file(s) and picture(s) under the same directory. Ensure you have all required software as described below. The LoveBox will play any mp3 file using mplayer and will transmit a random image on an OLED C clickboard.
Hardware
Wood Box
: For the construction of the box, standard A8 sheet made from plywood was cut using a laser cutter. The standard
instructable
file is far too small to fit all of the components, so I have attached a modified file that is big enough to contain required hardware. The shape can be changed to anything, just make sure the length of the straight lattice matches the outer circumference of the shape you want; on that same vein if you decide to change the size of the love box make sure you scale the size of everything uniformly. For specific instructions for putting together the container, refer to the instructables guide. A Dremel was used to cut open the window for the display, however I suggest you use the laser cutter for a more clean cut.
Electronics:
For the assembly of the electronics:
1. Solder P1_5 (VBUS) and P1_7 (VIN) and pins onto microUSB breakout board
2. Attach breakout board to USB1 (P1_7 – P1_15)
3. Attach click board to P1_2 – P1_16 and P2_1 – P2_15
4. Connect OTG USB to microUSB converter to breakout board
5. Connect speaker USB to OTG converter

Software
Display
: OLED C clickboard may not be available in your device tree overlay. Changing your directory to /lib/firmware and running ls will list all device tree overlays (shown below). If PB-SPI0-OLEDC-CLICK is not showing, you need to add the device tree overlay by following
these instructions
.
Audio
: After connecting the speaker through USB, we must ensure you have all the necessary libraries installed on the pocketbeagle. If you do not have ALSA installed, you can follow instructions for doing so
here
; you should also already have mplayer installed on your device by default. Make sure the beaglebone is properly displaying the audio device by running aplay -l in the terminal (see image below). If the play file I have submitted is not working, it may be because your device is not the default device being called by ALSA, in which case you can modify your code as shown below where "Device" is the name of your device as listed using aplay -l. Notice you can adjust volume when using mplayer, and I would suggest testing with a value <10 to prevent any damage to the speaker.
mplayer -ao alsa:device=default=Device -volume 10 <mp3filename>.mp3
*If at any point your audio device becomes stuck, disconnect the pockbeagle and then reconnect.
Demo
Future Improvements
- Cycle through pictures while playing the song
- Add laser cut window to lid on illustrator file (manually done for this prototype)
- Engrave message on lid on illustrator file
- Add red LEDs that beat like a heart and hide them
- Add voice recording saying "I love you" or other message before playing song
Comments are not currently available for this post.