Categories: Beginner
Hello,
I just wanted to promote some findings. The LED can be toggled on and off while the OpenCV lib. records from a Webcam and all while attached to the BBGW.
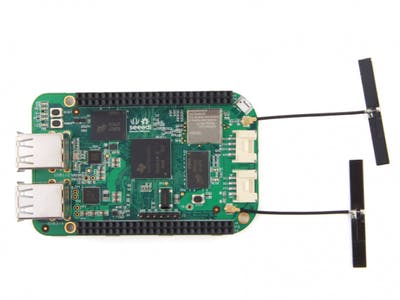
The BBGW stands for BeagleBone Green Wireless. I have one, single LED that I light on and off (toggle) while my video records to file on the BBGW.
So, let us get to it!
First, get your image (as usual).
https://staging.digitalblender.co/latest-images
is the site to grab your image. Oh and look here for how to apply this image to your board. Hint: You will need a SD Card with adapter to apply the Etcher image writer from your desktop to the SD Card. Then, you can apply the SD Card to your machine. In this case, we are using the BBGW. Oh and I noticed there was something new!
The "new" I was describing in the last sentence points directly to this shameful, unaffiliated plug:
https://wiki.seeedstudio.com/BeagleBone-Green-Gateway/.
Seeed Studio does it again!
Okay…so. What does our actual set up look like? Well, the anode of the LED, the longer lead, attaches to the 470 ohm resistor. I forgot to mention the resistors in the parts section. You will definitely need a resistor of 470 ohm or greater so that the GPIO pin on the BBGW does not get damaged.
…
Okay. So, the GND pin on the P8 header on the BBGW goes to the cathode, the shorter end, lead of the LED by way of jumper wire. Black is an all around good color for GND (ground) or you can also use Green too. Green is another color for GND that is a good choice. There is a neat blog post here:
http://blog.sparkfuneducation.com/what-is-jumper-wire.
Some people say "it does not matter" but I think it does matter. What is the hoopla about? Well, red wire is usually for Positive and black coated wiring is usually for Negative.
The GPIO pin of P8.10 on the P8 header is what I am using. You are free to use whatever GPIO pin or other type of communication you would like to use. This example just uses the P8.10 pin and GND pin on the P8 header.
Get this idea if I was not clear earlier! Oh and never "HotPlug" your P8 and P9 headers on the
BeaglBoard.org
family of boards. "HotPlug" basically means the opposite of "ColdPlug" which is the plugging in of peripherals, jumper wires and the like, while the board is powered down. So, "HotPlug" means to plug in hardware while the board is on and running. Do not HotPlug your Header Pins on this board! Serious. You can damage the board or yourself.
BBGW P8.1 (GND) >>> Green or Black Jumper Wire >>> Cathode of LED >>>

Anode of LED >>> 470 Ohm resistor >>> Red Jumper Wire >>> P8.10 (GPIO)
Okay. So, enough ideas. Let us get to it.
Once booted and once the board is up and running, we need to add some libraries.
sudo apt update

sudo apt upgrade

sudo apt install python3-opencv python3-numpy xfce4 tightvncserver
This will take some time. Once the libraries have installed, use sudo poweroff or sudo shutdown -h now to turn the power off on your board.
Now, we can plug in our jumper wires, resistor, LED, and plug in the USB webcam for use with OpenCV and Adafruit_BBIO to toggle the LED.
xfce4 is for a GUI and tightvncserver is for serving the BBGW GUI in another program like VNC Viewer. You will need to install VNC Viewer on your computer, not the BBGW, so you can view, if you want, the video while it records and all while the LED toggles every five seconds.
When you have set up all your hardware and got all the required software, boot the board! Now, at the end of this article, there will be a set of source to use for recording to file, toggling the LED, and viewing live feeds on the 32-bit am335x SoC onboard the BBGW. The lasting impression may not be as "powerful" as you think but you can always use Filezilla to put your file, the one that will be given at the end of this tutorial, on your Debian Desktop or Ubuntu Desktop to view with better speeds with VLC or another program.
Okay, so…
We should be booted, our hardware should have been put together before booting, and we should have all this software for doing what it is we are doing here: Video recording, LED usage toggling, and file management!
Type on your console: vncserver
Set up your required info. so you can sign in to the VNC Viewer b/c that is the only way you will get the file to run.
Go to VNC Viewer and sign in with your credentials. You will have to type on your BBGW console: ip addr. This will allow you to get the info. of your IP Address on the BBGW.
Now, with the given source, type nano, or use your favorite editor, YourFile.py.
So: nano
YourFile.py
Use the end source or your favorite source to run the python file like so.
python3
YourFile.py
That should be it. If you have any questions, do not hesitate.
Seth
P.S. Geaux Cajuns! Also, if you set up a server for your OpenCV procedure, you can view the video directly on the web instead of relying on processor power from your BBB or BBAI.
Comments are not currently available for this post.