Categories: Advanced
Intro
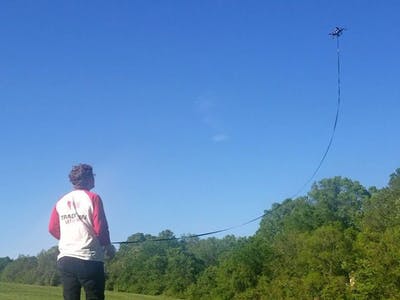
Our team was actually assigned this project as a school project. Our task was to build a drone on a leash to mimic
other
projects
, while being safe and open source.
If you’ve ever built a drone with a BeagleBone Blue as the companion computer/autopilot you know how it can be relatively simple overall. Sure there are quirks to run into, but overall, there was relatively little headache.
These instructions assume minimal experience with drones/BeagleBone Blue at all. Here’s how you’ll want to start.
Step 1 – Install and Configure Ardupilotblue:
Initialize the BeagleBone Blue, and install ardupilot using
this
tutorial. There are a lot of resources there, as well as
this
beginners guide.
Step 2 – Frame, Motors, and ESC:
Assemble your frame. You can use just about any frame, we picked this one because it’s small and lightweight. Assembling the frame is straightforward. Just make sure if there’s something electrical that’s going sitting on carbon fiber, you insulate it. We ran into that issue a few times. As far as motors are concerned, make sure you know what type of frame you’re flying with. Ours is an H, so we configured it according to the chart
found here
.

Mounting the motors could be done after our ESCs were calibrated. We used these settings:
Because we’re using a battery monitor instead of having the drone land on it’s own when the battery gets low. Simply power the card and ESC and it will make a happy chirp when it’s finished.
We powered the ESCs by soldering the wires to a distribution board. That board also had a regulator to step down to 5V, which we used to power the BeagleBone Blue and the RC receiver.
One thing to note is that since our frame has the back motors mounted upside down, technically, the back two motors are switched.
Use threadlocker
to make sure the motor mounts won’t wiggle out.
Once the motors and ESCs are mounted, you can test them with the throttle on the RC receiver (outputting a PWM signal), just to test it out.
Step 3 – RC to BeagleBone:
By default, the receiver will output a PWM, on multiple channels. We need a PPM signal to go into the BeagleBone Blue, which will in turn output four distinct PWM signals on different connectors.
The manual has the steps you need to take to reconfigure the receiver, but you re-pair the receiver with a jumper on to set it on PPM mode. That PPM signal goes to E4, pin 4.
We didn’t have the connector to fit, and it wouldn’t ship in time before we wanted to fly. Instead, we removed the connector and soldered it to the pad. Yes it worked. No you should not follow in our footsteps. Just order the connector.
After that just plug in the proper motors into the labeled PWM connectors and you’re almost ready to fly.
Step 4 – Preflight:
Mount the propellers good and tight. For our specific motors, the included locknut didn’t seen like it wanted to fit, but it did. Make sure the motors are spinning in the right direction, and the propellers are not installed backwards. There’s a difference between CCW and CW.
Install Mission Planner – this communicates telemetry over WiFi between the BeagleBone Blue and your laptop. Before you try to arm and fly the drone, you’ll want to dive into the Initial Setup (once you’re connected).
Select your frame time, calibrate the level and accelerometer, as well as compass and radio.
Once that is complete, go into Config/Tuning, Standard Prarams. If you don’t uncheck things like GPS (which isn’t installed), it will never get off the ground.
You might run into the error that RC minimum is less than trim. If that’s the case, dive into the Full Parameter Tree and change it manually.
The next step is to configure the PID gains, The defaults were way off, which made the drone lean and wobble a lot.
If these don’t work, feel free to experiment. some values are below the minimum, you can override by using the Full Parameter List/Tree.
Step 5 – First Flight and Leash:
From here, you can fly the drone as normal. All that’s left is to mount the joystick to the frame, and attach the outputs to the ADC inputs. We again did not have the connector for it, so the wires are soldered to pads.
The leash is mounted to the joystick with epoxy, and it quite firmly attached.
We set up a switch on our controller to toggle between three different modes.
Stabilize is where the drone launches. Then a switch is flipped to put us into altitude hold. Finally, once we’re confident with the position, we can put it into Guided Mode with another flip of the switch. If the python script is running, it will provide Mavlink commands based on the joystick position to set the attitude, which the guided mode uses.
Final Pictures
Notes
- If you want to use a GPS module, you can. That would make holding altitude a little easier and relying on the barometer.
- Setting the python script to run at start will save you from having to SSH in and launch it manually. We never did that since it only took an extra 2 minutes.
- Feel free to play around with the code!
Comments are not currently available for this post.